

How to Grow Rudbeckia from Seed
Black-eyed Susan · Germinates in 14 Days · Blooms Year 1
Rudbeckia hirta 'Marmalade' is the rare perennial that rewards growers in its very first season — surface sow in April, and you have golden-yellow flowers with dark centres from late July, without a season of waiting.
Quick Facts — Rudbeckia hirta 'Marmalade'
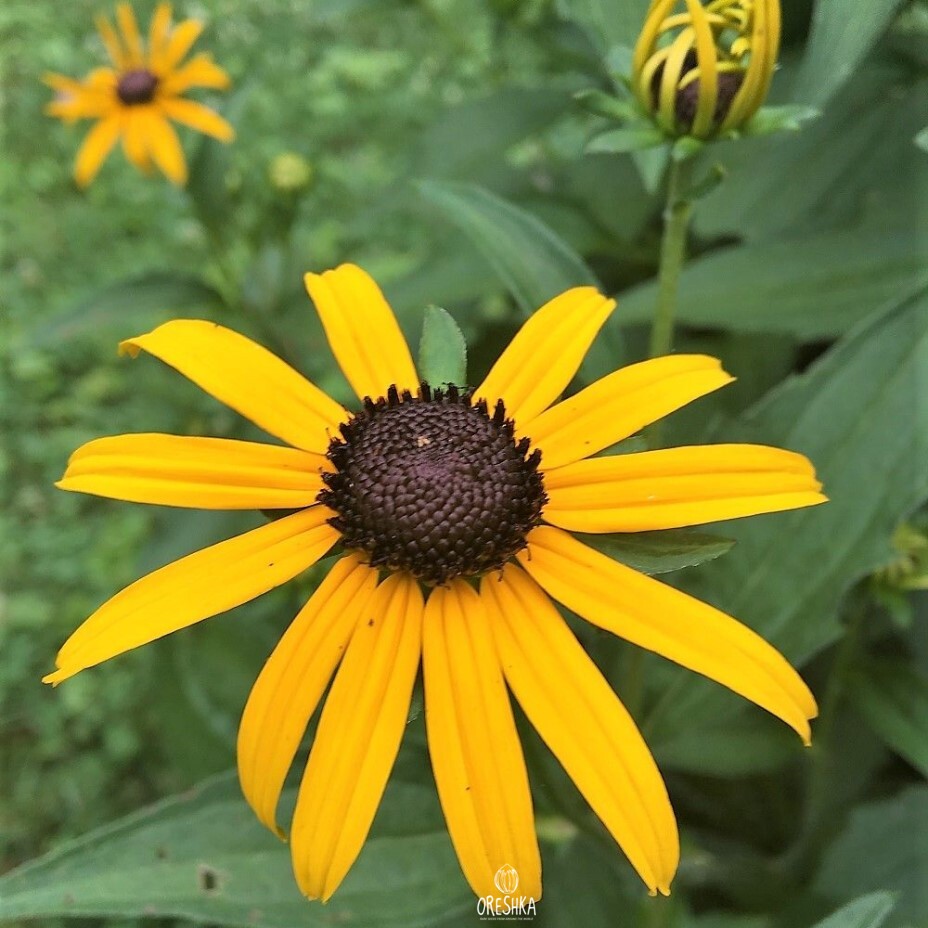
Rudbeckia hirta — the Black-eyed Susan — is one of the most reliable flowering plants available for growers in cold climates. Native to the grasslands of North America, it evolved to handle dry summers, hard winters, and heavy competition: qualities that translate directly into a garden-tough perennial that needs no coddling and rewards even neglectful care. The 'Marmalade' cultivar produces compact plants 50–60 cm tall, bearing rich golden-yellow daisy flowers 7–10 cm across with a domed brown-black centre, from July until hard autumn frost.
Unlike many prairie perennials, Rudbeckia requires no cold stratification, no soaking, and no sterile medium. The seed is light-dependent — surface sowing onto moist compost under a propagator lid is all the preparation needed. This makes it one of the most accessible perennials for growers stepping up from annuals to long-lived border plants. Once established, it self-seeds freely, creating expanding clumps that persist for years without resowing.
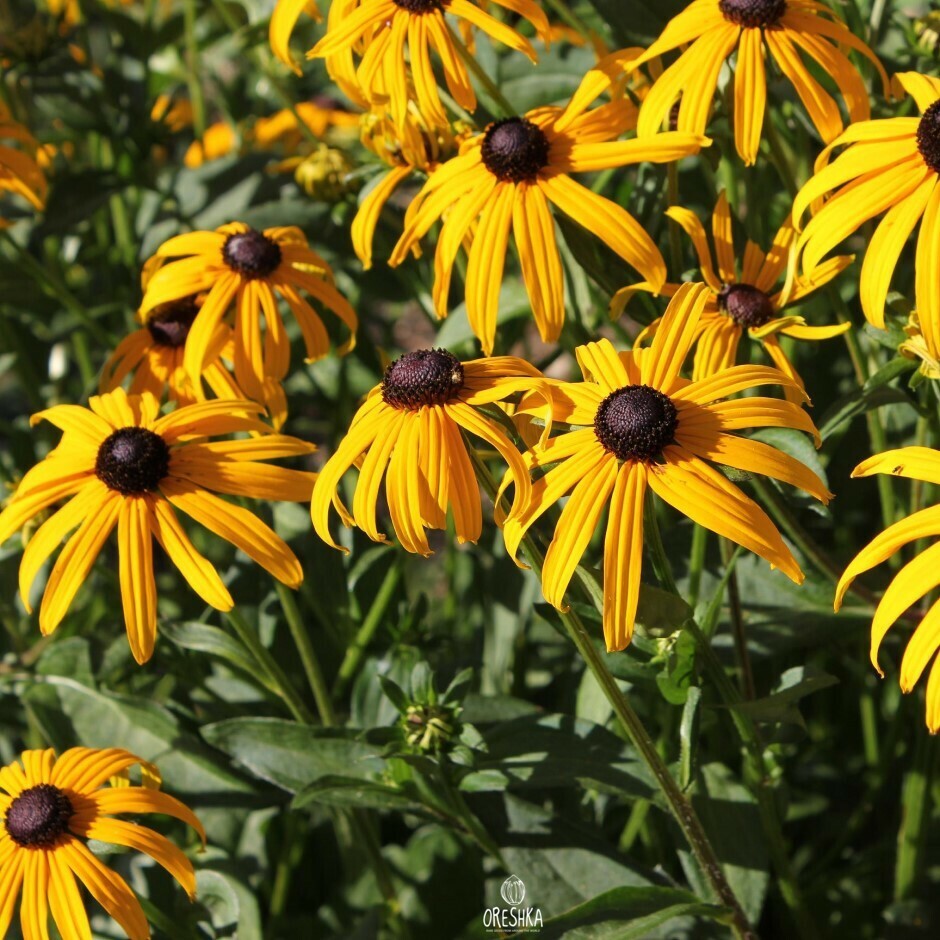
Rudbeckia is a prolific pollinator plant — it ranks in the top 20 UK plants for late-season bee and butterfly forage, flowering through September when most summer perennials are spent. In a mixed border it functions as both a visual anchor and a functional ecological resource during the lean weeks of late summer.

What to Expect — Season by Season
Rudbeckia is fast for a perennial — here is the complete lifecycle from seed to self-sustaining colony.
Seeds sprout without any preparation
Surface sow onto moist seed-starting compost at 18–22°C. Cover the tray with a clear propagator lid or cling film to retain humidity. Germination occurs in 14–21 days. The first seedlings appear as two small oval cotyledons on a thin stem — remove the cover once 50% of seeds have sprouted.
First true leaves and pricking out
True leaves appear 10–14 days after the cotyledons. At this stage, seedlings can be pricked out into individual 9 cm pots. Handle by the leaves, not the stem — Rudbeckia stems are brittle at this age. Move to bright indirect light or a windowsill with 4+ hours of sun. Begin hardening off in week 5–6 by placing pots outdoors during the day.
Into the border or a larger container
Plant out after last frost at 30–45 cm spacing. Rudbeckia develops quickly in open ground — plants reach 30 cm within 2–3 weeks of transplanting in warm, sunny conditions. Water in well after planting and once weekly until established. In containers, use 20–30 cm diameter pots with free-draining compost.
Flowers from July — and again until frost
First flowers open 70–90 days from sowing — typically late July from an April indoor start. Each plant carries 10–30 individual flower stems. Deadhead spent blooms promptly to trigger the next flush — plants kept deadheaded continue flowering 4–6 weeks longer than those left to set seed.
Let the last heads set seed — the plant rewards you
Stop deadheading in September and allow the final 3–5 flower heads to dry fully on the plant. Seeds ripen in 4–6 weeks after petal drop. Leave dried heads in place through winter — birds feed on the seed and the stems provide structure in the border. Self-sown seedlings appear around the parent plant in spring.
The planting expands without resowing
Individual Rudbeckia hirta plants live 2–4 years. In practice, established patches self-seed so prolifically that the colony is self-renewing indefinitely — no annual resowing required. Thin overcrowded self-sown seedlings to 30 cm spacing in spring. Divide mature clumps every 3–4 years in autumn to maintain vigour.
What You Need
Seed-starting compost
Fine-textured, low-nutrient mix — pH 6.0–7.0. Avoid bark-heavy or gritty mixes that dry out too fast at the surface where the seeds sit.
Seed tray with clear lid
A standard 37×24 cm half-tray with a vented propagator lid. The lid maintains 60–70% humidity during the 14–21 day germination window without waterlogging.
Fine vermiculite
A 1–2 mm covering of vermiculite after surface sowing retains moisture around seeds while admitting the light Rudbeckia needs to germinate. Do not use compost as a cover — it is too dense.
Light source
A bright windowsill with 4+ hours of direct sun, or a grow light set 15–20 cm above the tray on a 14-hour timer. Adequate light prevents the etiolated (leggy) seedlings that are the most common failure mode.
9 cm pots for pricking out
Individual 9 cm round pots for transplanting at the 2-true-leaf stage. Deeper pots than cells allow unrestricted root development before the plant moves to its final position.
Low-nitrogen liquid feed
A balanced or high-potassium liquid fertiliser (such as tomato feed, NPK with high K). Apply at half-strength from week 4 of seedling growth. High-nitrogen feeds produce lush foliage with delayed flowering in Rudbeckia.
How to Grow Rudbeckia from Seed — Step by Step
Prepare and moisten the compost
Fill the seed tray to within 1 cm of the top with fine seed-starting compost. Press gently to level without compacting. Water from below by sitting the tray in a shallow container of water for 15–20 minutes until the surface is uniformly moist — top-watering dislodges surface-sown seeds and creates an uneven moisture profile.
Surface sow — no burial, no darkness
Scatter seeds thinly across the surface of the moist compost — aim for one seed per 2–3 cm. Rudbeckia hirta is a light-dependent germinator: seeds require exposure to light to trigger germination. Do not cover with compost. Instead, dust the thinnest possible layer of fine vermiculite (1–2 mm) over the surface to retain moisture contact with the seeds without blocking light transmission.
Cover and place at 18–22°C
Place the clear propagator lid on the tray and move to a position with bright indirect light at 18–22°C. A south-facing windowsill or the top of a warm appliance works well. Avoid direct afternoon sun through glass, which raises tray temperature above 30°C and cooks seeds. Check daily: if condensation is heavy inside the lid, open the vents or lift one corner briefly.
Germination — 14 to 21 days
First seedlings appear 14–21 days after sowing. They emerge as two small oval cotyledons on a thin stem. Remove the propagator lid once 50% of seeds have sprouted and move the tray to the brightest available light. If using a windowsill, rotate the tray 180° daily to prevent seedlings leaning toward the glass.
Prick out at the 2-true-leaf stage
When seedlings show two true leaves (the leaves after the initial cotyledons), prick out into individual 9 cm pots of all-purpose compost. Use a pencil or dibber to lever seedlings out by their root mass — handle the leaves, not the stem. A damaged leaf recovers; a damaged stem does not. Space one seedling per pot. Water in and return to the windowsill or grow light.
Harden off for 7 to 10 days
Before transplanting to the garden, acclimatise plants gradually to outdoor conditions. Place pots outside in a sheltered spot on mild days (above 10°C) for 1–2 hours, increasing to all day over 7–10 days. Bring in if frost is forecast. This prevents transplant shock from sudden exposure to wind, UV intensity, and temperature swings that differ from indoor conditions.
Plant out at 30–45 cm spacing
Transplant to the border or a 20–30 cm container after last frost. Dig a hole twice the width of the root ball and plant at the same depth as the pot — do not plant deeper, as burying the crown encourages rot. Space 30–45 cm apart. Firm soil around roots, water thoroughly, and mulch between plants with 5 cm of compost or bark to retain moisture and suppress weeds during establishment.
Deadhead for continuous bloom
Once flowering begins, remove spent heads promptly by cutting the stem back to the next lateral bud or leaf node. This redirects energy from seed production to new bud formation, extending the flowering season by 4–6 weeks compared to undeadheaded plants. Continue deadheading until late September, then stop and allow the final heads to ripen for self-seeding. Feed with half-strength high-potassium liquid feed every 3–4 weeks during the flowering period.
Pro Tip — From the Oreshka Collection
Succession sow for 16 weeks of continuous bloom
A single April indoor sowing produces flowers from late July to mid-October — approximately 10 weeks. To extend to 16+ weeks, make a second direct outdoor sowing in late May. The later sowing flowers from mid-September and continues after the first batch is spent, bridging the gap to autumn frost with no additional plants to overwinter.
Use self-sown seedlings to fill gaps without resowing
Allow 3–5 flower heads to dry on the plant in September. By April, self-sown seedlings appear in a 30–50 cm radius around the parent plant. These can be transplanted to fill gaps in the border in May — they establish faster than pot-raised seedlings because they have not experienced root disturbance. Thin to 30 cm spacing and water in.
Companion plant with Cornflower for a 5-month flowering window
Centaurea (Cornflower) blooms from May to July; Rudbeckia peaks from July to October. Planting both in the same border gives uninterrupted colour from May to October — a 5-month window with only two species. Both are low-maintenance, cold-hardy, and excellent for pollinators. The blue of Cornflower and gold of Rudbeckia are a high-contrast combination that reads well from a distance.
Leave seed heads for winter bird forage
The dried seed heads of Rudbeckia hirta are an important food source for Goldfinches, Siskins, and other small seed-eating birds in October through January — months when natural seed sources are scarce. Leave all stems uncut until late February, then cut to ground level. This single habit supports local bird populations with no additional effort and adds winter structure to the border.
Rudbeckia vs. Echinacea vs. Helenium
Three prairie-native, daisy-family perennials often used in the same border contexts — here is how they differ from seed to maturity.
| Feature | Rudbeckia hirta'Marmalade' · Black-eyed Susan | Echinacea purpureaPurple Coneflower | Helenium autumnaleSneezeweed |
|---|---|---|---|
| Stratification | None | None (cold improves %) | None |
| Germination time | 14–21 days at 18–22°C | 10–21 days at 20–25°C | 7–14 days at 18–22°C |
| Bloom from seed | Year 1 — 70–90 days | Year 2–3 (rarely year 1) | Year 1 — 90–120 days |
| Flower colour | Golden yellow, dark brown centre | Pink to purple, orange-brown cone | Yellow, orange, red-brown bicolours |
| Mature height | 50–60 cm | 60–90 cm | 60–120 cm |
| Hardiness zone | Zone 3–9 | Zone 3–9 | Zone 3–8 |
| Self-seeds? | Prolifically — self-sustaining | Moderately | Lightly |
| Drought tolerance | High once established | High once established | Medium — prefers consistent moisture |
Common Mistakes
Covering seeds with compost
Rudbeckia hirta is a light-dependent germinator — covering seeds with even 3–4 mm of compost suppresses germination significantly. The correct covering is fine vermiculite at 1–2 mm depth, which retains moisture while transmitting sufficient light. This is the most common failure point for growers accustomed to burying larger seeds.
Sowing at too low a temperature
At soil temperatures below 15°C, Rudbeckia germination rate drops sharply and the process can take 4–6 weeks rather than 2–3. Many growers conclude the seeds have failed and discard them. If sowing in early spring (March–April), use a heated propagator or place the tray on top of a warm appliance — measure actual compost temperature with a thermometer rather than relying on room temperature.
Growing on a dim windowsill — producing leggy seedlings
Rudbeckia seedlings grow toward the nearest light source. On a north-facing windowsill or in rooms with fewer than 4 hours of direct sun, seedlings become etiolated — tall, thin, weak-stemmed plants that snap at transplanting and never produce the strong, compact growth of properly-lit seedlings. Supplement with a grow light set 15 cm above the tray if bright light is unavailable.
Skipping deadheading and wondering why flowering stopped
Rudbeckia terminates flower production when it has set sufficient seed. Without deadheading, each plant typically produces a strong first flush of 10–15 flowers, then slows markedly as it redirects energy into the maturing seeds. Regular deadheading — removing spent stems back to the next lateral bud — extends the season by 4–6 weeks and doubles or triples total flower count per plant.
Cutting all stems back in autumn — losing self-sown seedlings
Cutting Rudbeckia stems to the ground in October removes the seed heads before they have fully ripened and shed their seeds. If maintaining the self-seeding habit is a goal, leave stems through winter and cut to 10 cm in late February. Self-sown seedlings appear around the crown in spring and can be transplanted or left to fill in the planting naturally.